Click on the Advanced settings to configure the below mentioned advanced settings.
- Profile
- Currency
- Language
- E-Pin
- Custom Field
- User Dashboard
- Tree
1. Profile
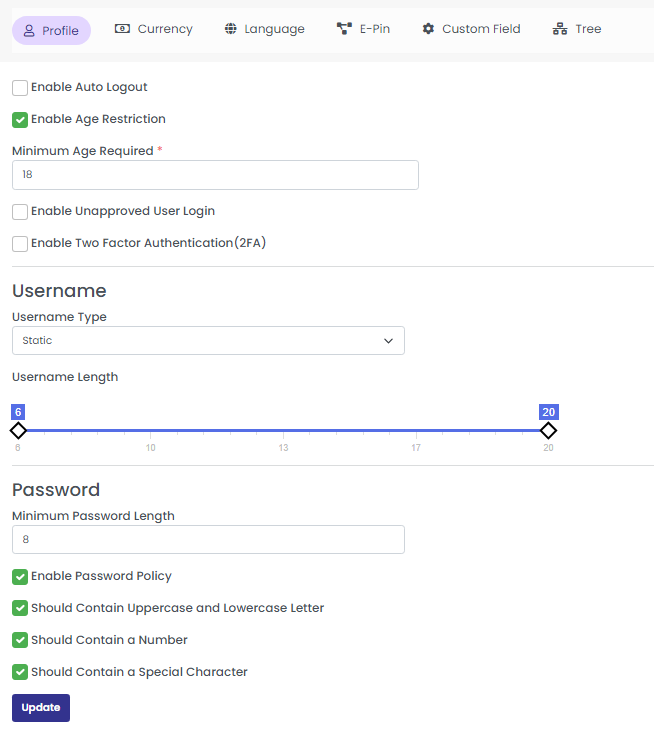
Under Profile, you can set the auto-logout feature, enable or disable Two Factor Authentication (2FA) using google authenticator, and enable age restriction. You can also set auto-generated usernames, and enable or disable strong password settings.
Update the following details to configure your profile by clicking the “profile tab’.
- Enable Auto Logout
- Enable Age Restriction
- Minimum Age Required
- Enable Unapproved User Login:
- Enable Two Factor Authentication (2FA)
Username
Username Type: Select username type (Static/Dynamic)
Username Length: Drag the marker to set the username length
Password
Set the length of the password, and enable the ‘Password Policy’ option to configure the password policy.
You can enable/disable:
- Uppercase and Lowercase Letter
- Number
- Special Character
Click on the update button to configure the profile settings.
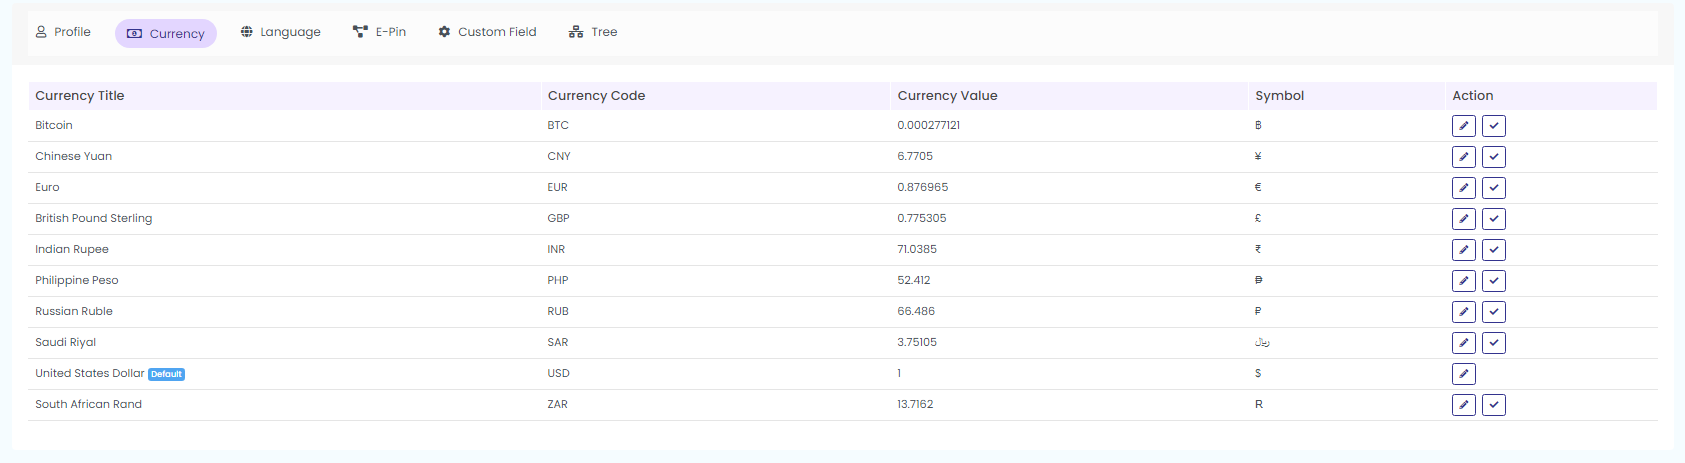
2. Currency
Click on the Currency tab to configure the currency settings.
Here you can show all currencies in the system, can enable and disable currencies, and can change currency values. You can also set default system currency here.
Click on Active or blocked option to view the active/blocked currencies as shown in the below screenshot.
Click on the icons in the action field as shown in the above screenshot to set the default currency and to edit the currency details.
You can see the following details when you click the ‘currency section’
- Currency Title
- Currency Code
- Currency Value
- Symbol
- Action
Click on the edit icon under action to edit currency.
Set as Default
Click on the icon next to the edit icon, to set the particular currency as the default currency
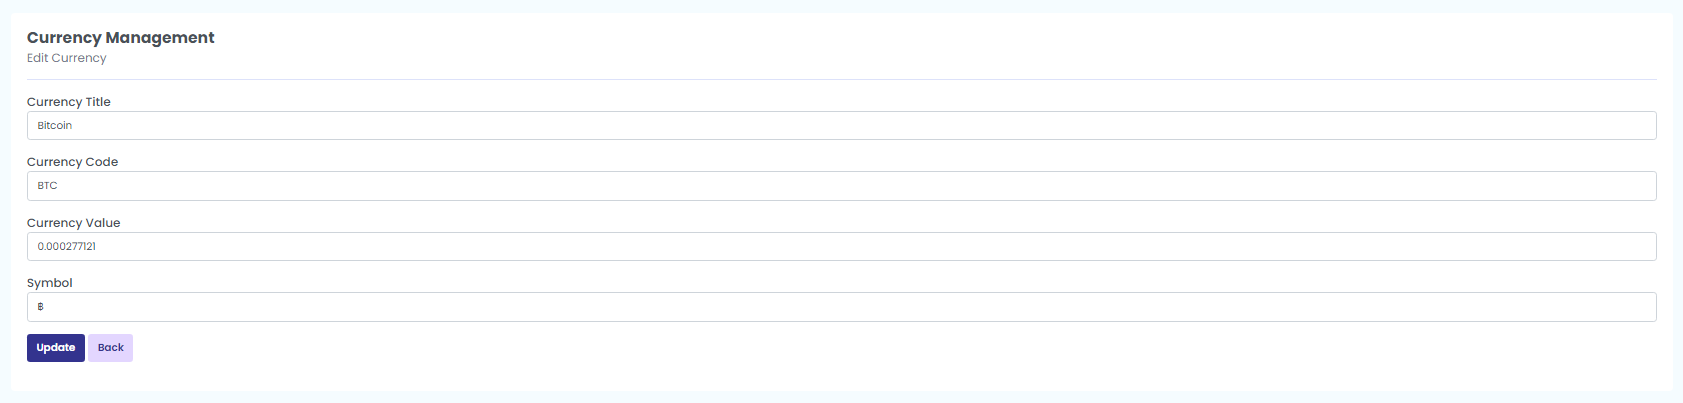
Edit
Click on this Edit icon to activate or inactivate the currency. Enter the following details
Currency Title, Currency code, Currency value, symbol and click on update to save the edits you have made. Then, ‘currency updated successfully’ message pops up.
3. Language
Here you can show all languages in the system, can enable and disable languages, and can set default system languages.
You can enable or disable languages under the section ‘Action’. Enable the action button and set the specific language as default language.

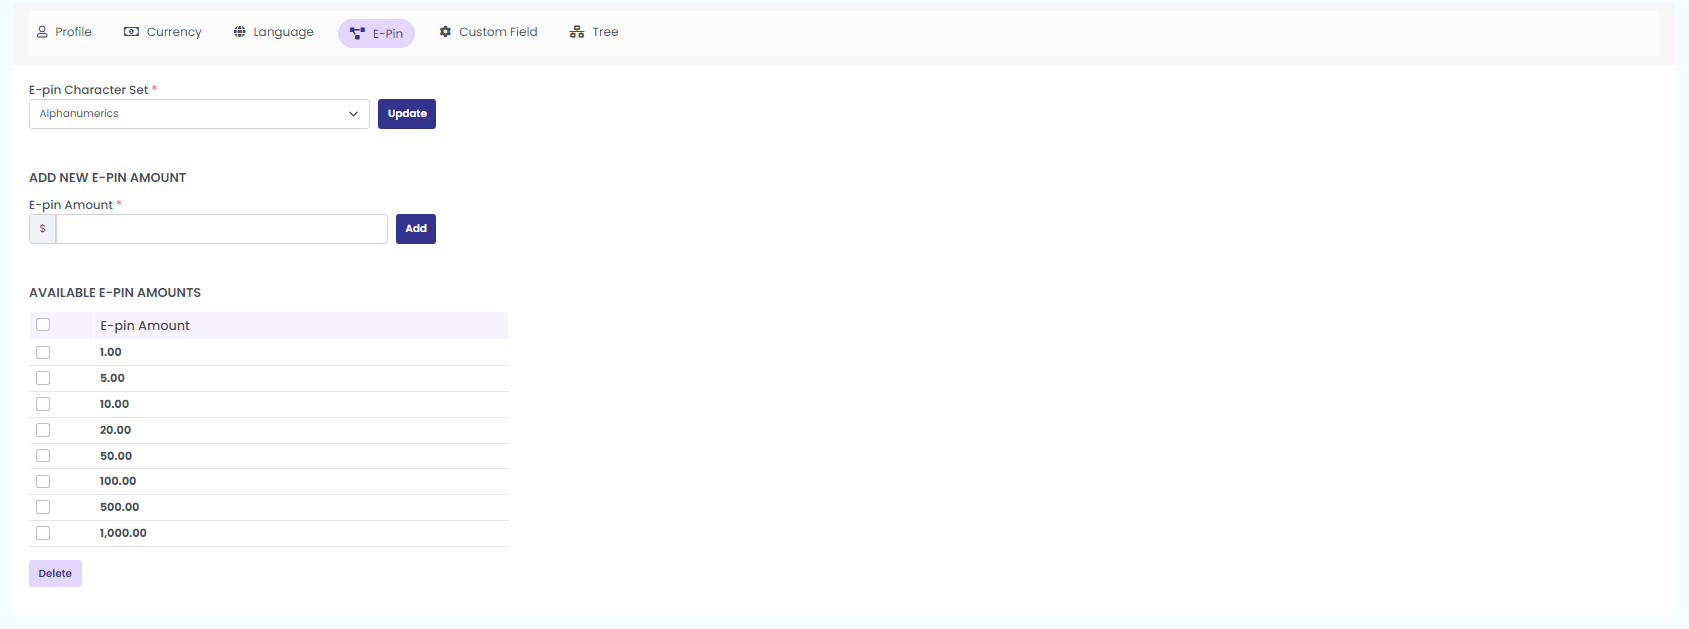
4. E-Pin
Here you can configure the E-pin character set, can add a new E-pin amount, and can remove an E-pin amount.
Click on the E-Pin tab to configure E-Pin settings and add a new E-Pin amount in the system.
E-Pin Configuration
In order to configure E-pin, enter the following details:
Set the E-Pin character format as either:
- Alphabets
- Numerals
- Alphanumerals
Click on the update button to configure the E-Pin.
Now, Add New E-Pin Amount
After entering the amount click on the ‘Add button’ to add the new E-Pin amount.
Available E-Pin Amount
You can view the available E-pin amounts here. The new Epin will be added under this list. You can also Delete any available Epin by selecting the respective e pins, and clicking on the ‘delete’ button.
5. Custom Field
This is the sign up form field
Edit fields like, Name, Type, Sort Order, Enabled, Mandatory
Click on the ‘update’ button to save the changes.
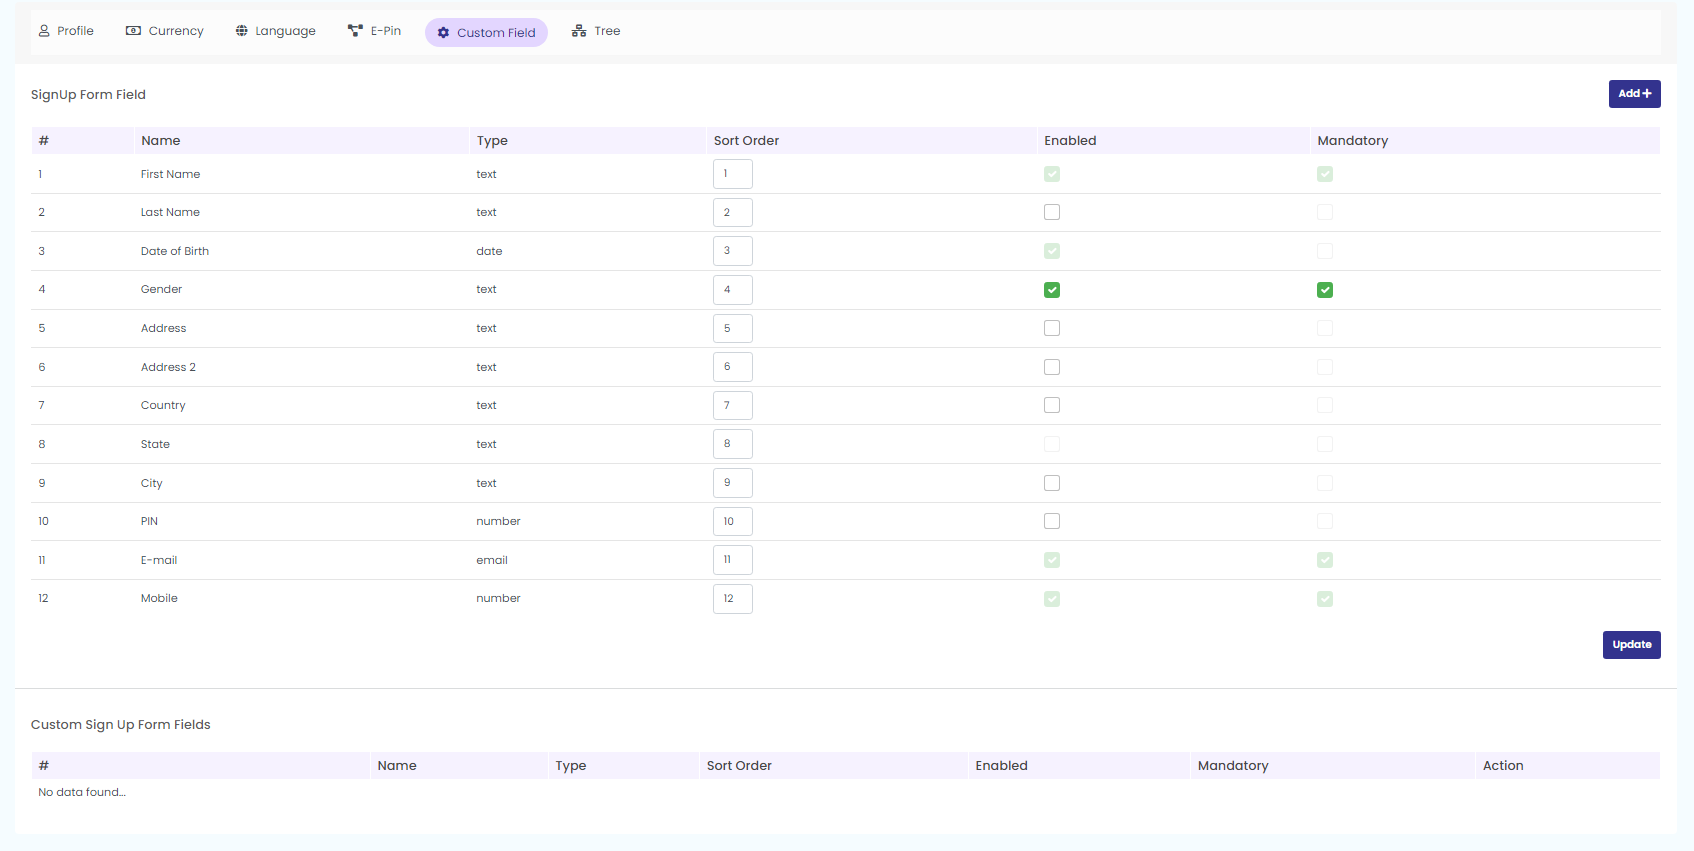
To add a new sign up form, click on the “Add” button from the top right corner.
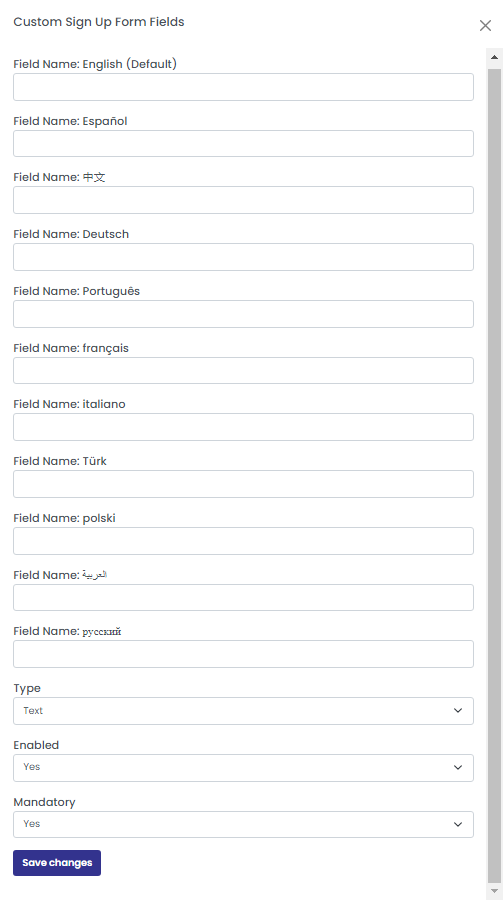
Fill in the necessary fields from the arrived pop up. Clock on ‘save changes’ option to add a new custom field.
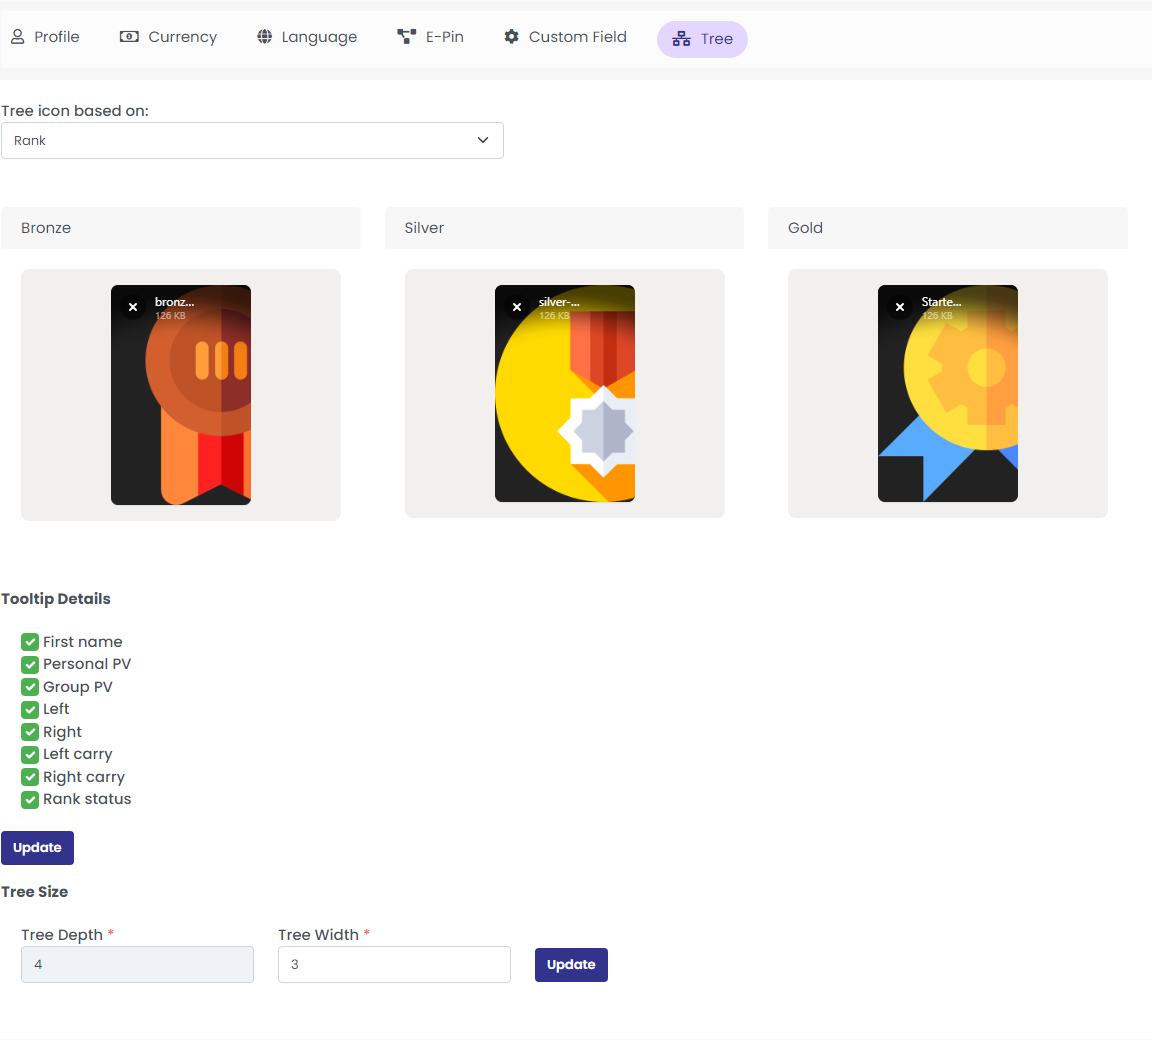
6. Tree
Click on the ‘Tree tab’ to configure the Tree settings.
Here you can set what icon to show in the tree. You can show icons based on the profile picture, based on member status (active/inactive), or based on membership package or rank. You can also configure what to show in the tree tooltip.
Fill in the necessary details like:
Tree Icon Based On: Select the any of the options (Member Status /Profile Image/Membership Pack/Rank) from the drop down to configure the tree icon
Tooltip Details : Enable the options to be displayed in the tree tooltip.
After selecting the options click on the Update button to configure the tree settings.
Tree size
Set the tree depth and width and click on the ‘update’ button.