The E-Pin module in Infinite MLM software helps administrators generate, manage, allocate and approve electronic pins (E-Pins) that are used for registrations, upgrades, or product/package purchases inside the system.
This section explains how the complete E-Pin workflow works based on the E-Pin screens shown.
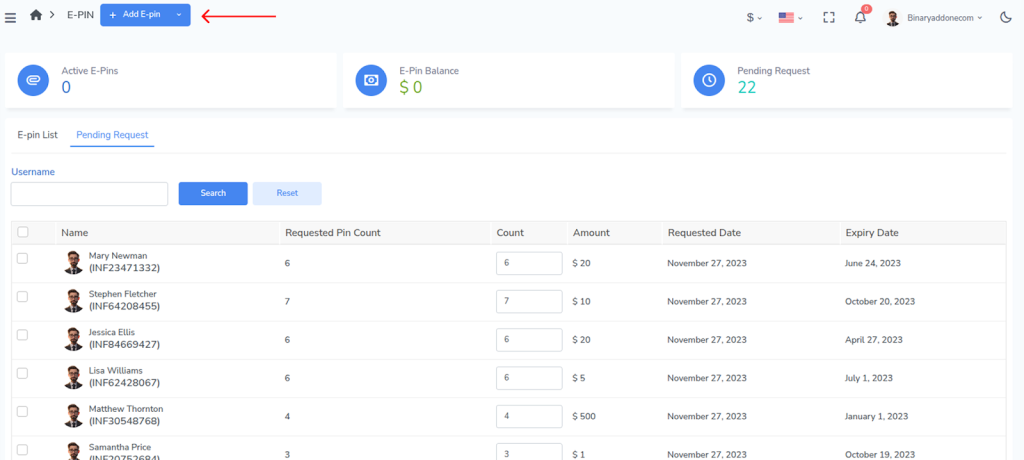
Overview of the E-Pin Dashboard
To access the E-pin Dashboard, click on E-pin from the left panel.
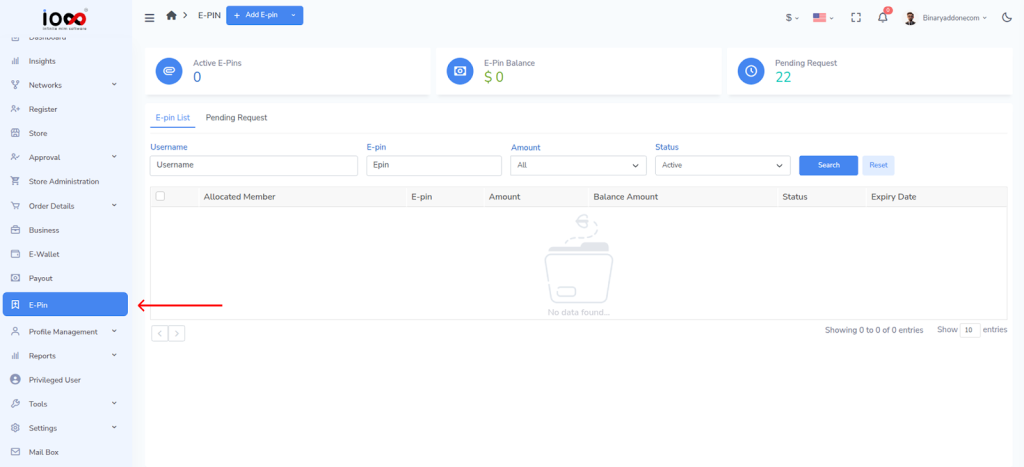
At the top of the E-Pin page, you can see three quick summary cards:
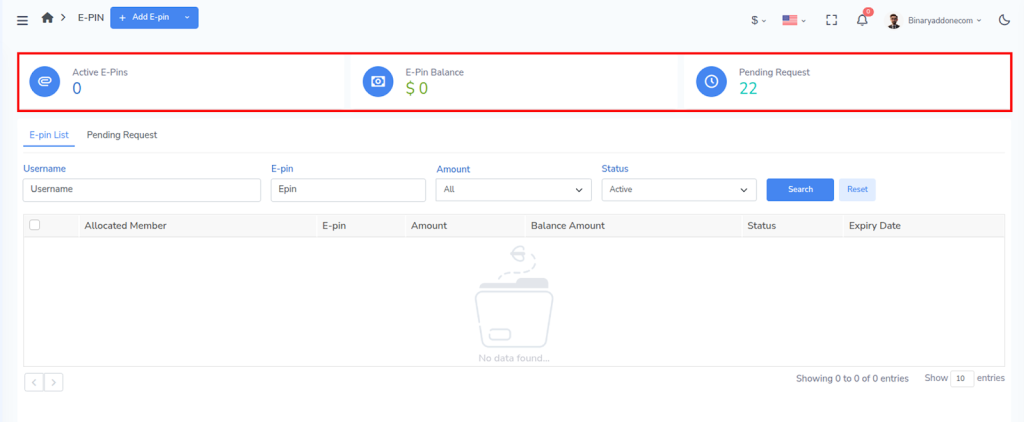
- Active E-Pins – Total number of usable E-Pins currently available.
- E-Pin Balance – Total monetary value of available E-Pins.
- Pending Request – Number of E-Pin requests waiting for approval.
The E-Pin module is divided into two tabs:
- E-Pin List
- Pending Request
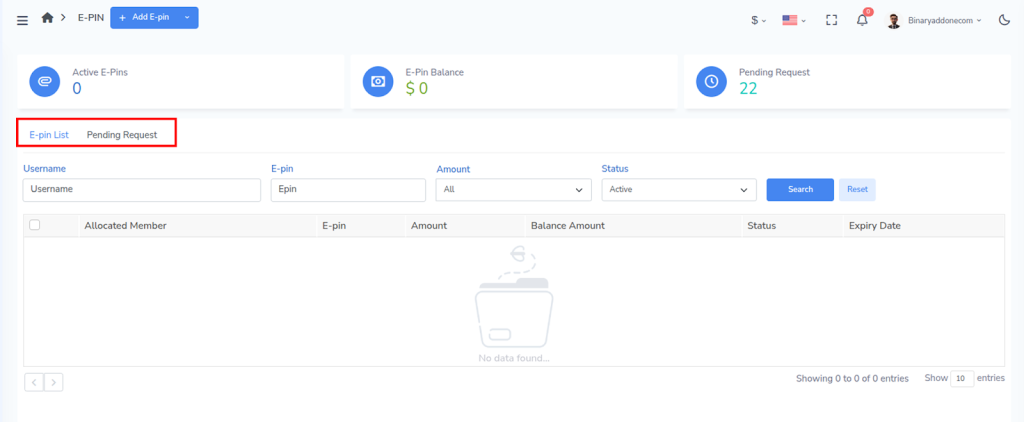
1. E-Pin List
The E-Pin List tab shows all generated and allocated E-Pins in the system.

You can search and filter E-Pins using:
- Username – Filter by allocated member
- E-pin – Search by a specific pin code
- Amount – Filter by pin value
- Status – Filter by Active / other statuses
Click Search to apply filters and Reset to clear them.
Columns in E-Pin List
Each row represents an E-Pin entry.
- Allocated Member – The user to whom the E-Pin is assigned
- E-pin – The unique pin code
- Amount – Value of the E-Pin
- Balance Amount – Remaining usable value (if partial usage is supported)
- Status – Current state of the pin (for example: Active)
- Expiry Date – Date after which the pin cannot be used
This screen is mainly used to:
- track issued E-Pins,
- verify whether a pin is active,
- check expiry and usage availability.
2. Pending Request – Manage E-Pin Requests from Users
The Pending Request tab shows all E-Pin requests submitted by members. These requests must be approved by an administrator before the pins become usable.
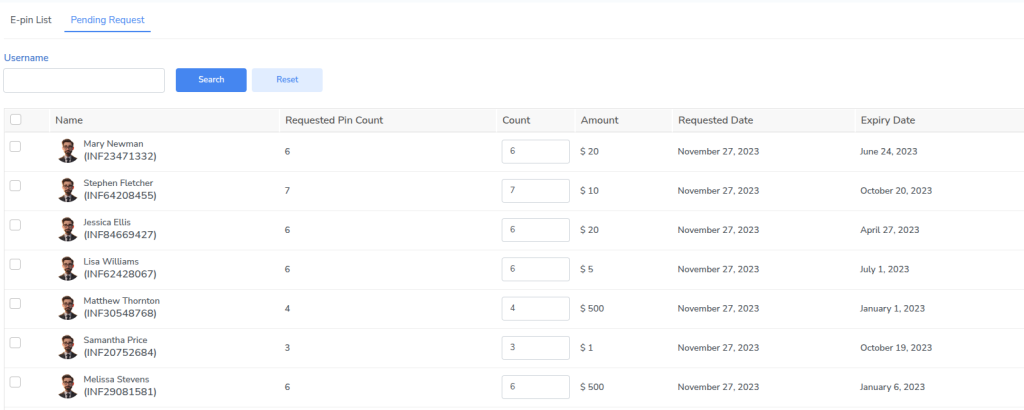
Filter options
You can filter requests using:
- Username
Columns in Pending Request
Each row represents a request made by a user.
- Name – Member who requested E-Pins
- Requested Pin Count – Number of pins requested by the user
- Count – Editable field to confirm how many pins will be issued
- Amount – Value of each pin
- Requested Date – Date when the request was created
- Expiry Date – Expiry date that will apply to the issued pins
A checkbox is available to select one or more requests for processing.
3. Adding E-Pins Manually
Administrators can also create pins directly using the Add E-Pin button at the top of the page.
To Add a New E-Pin:
Step 1: Navigate to the top left of the screen and click on the Add E-pin button.
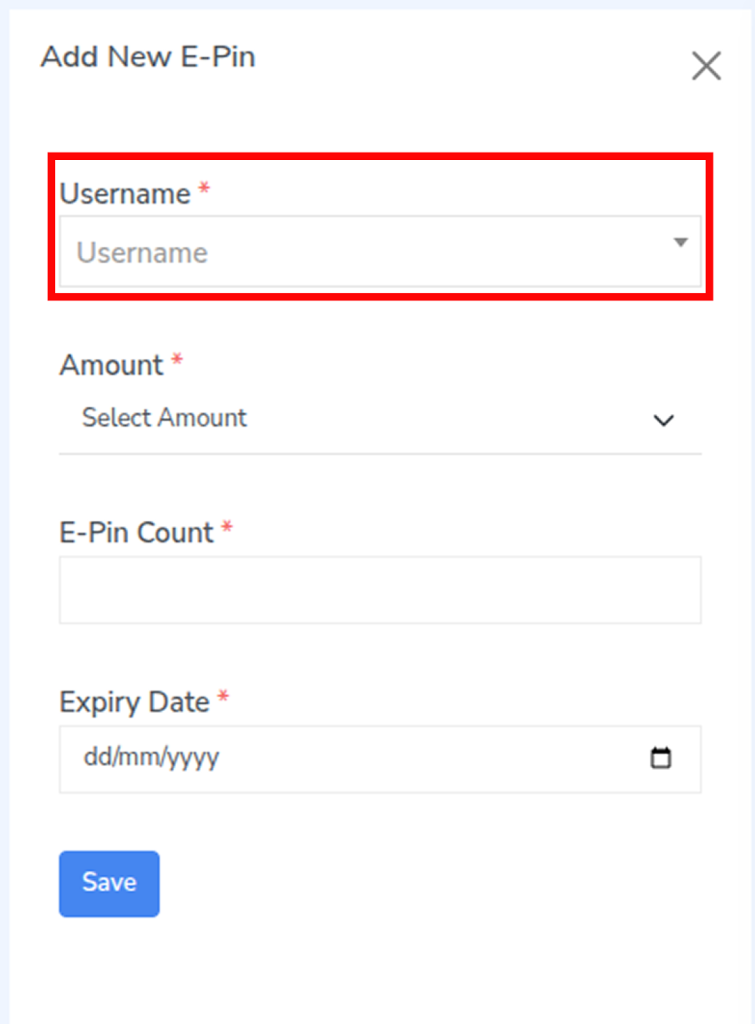
Step 2: An Add New E-Pin window will open.
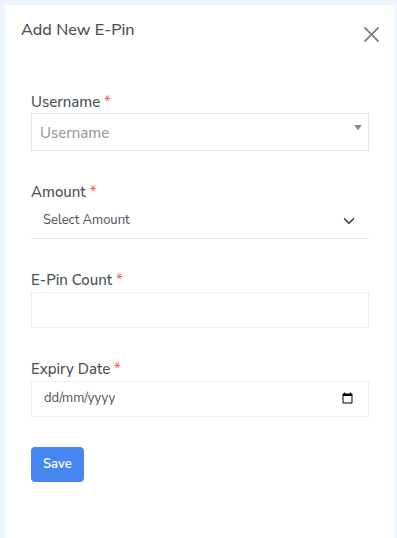
Step 3: Choose the user from the dropdown.
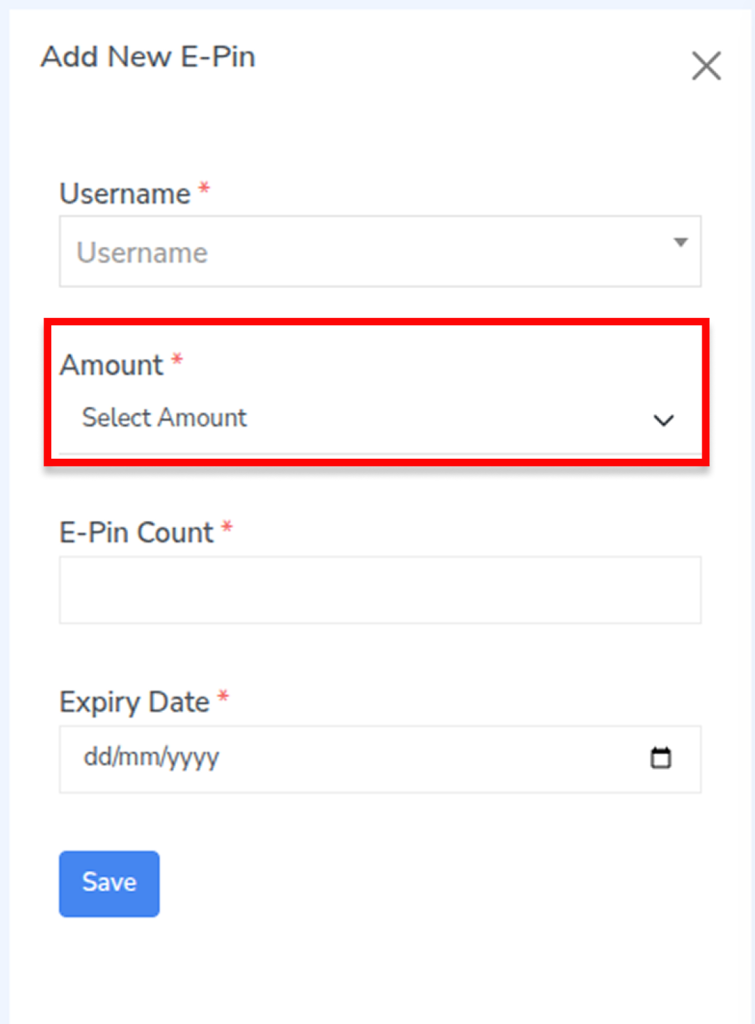
Step 4: Choose the E-Pin value from the Amount dropdown.
Step 5: Enter the E-Pin Count i.e how many E-Pins you want to generate.
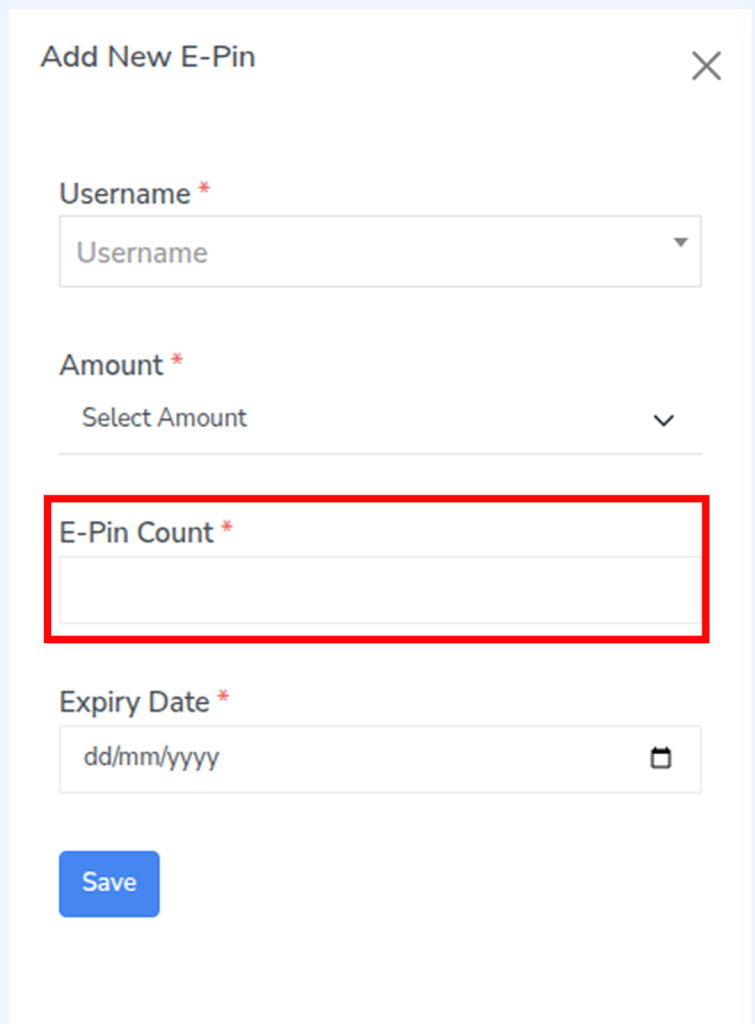
Step 6: Select the Expiry Date.
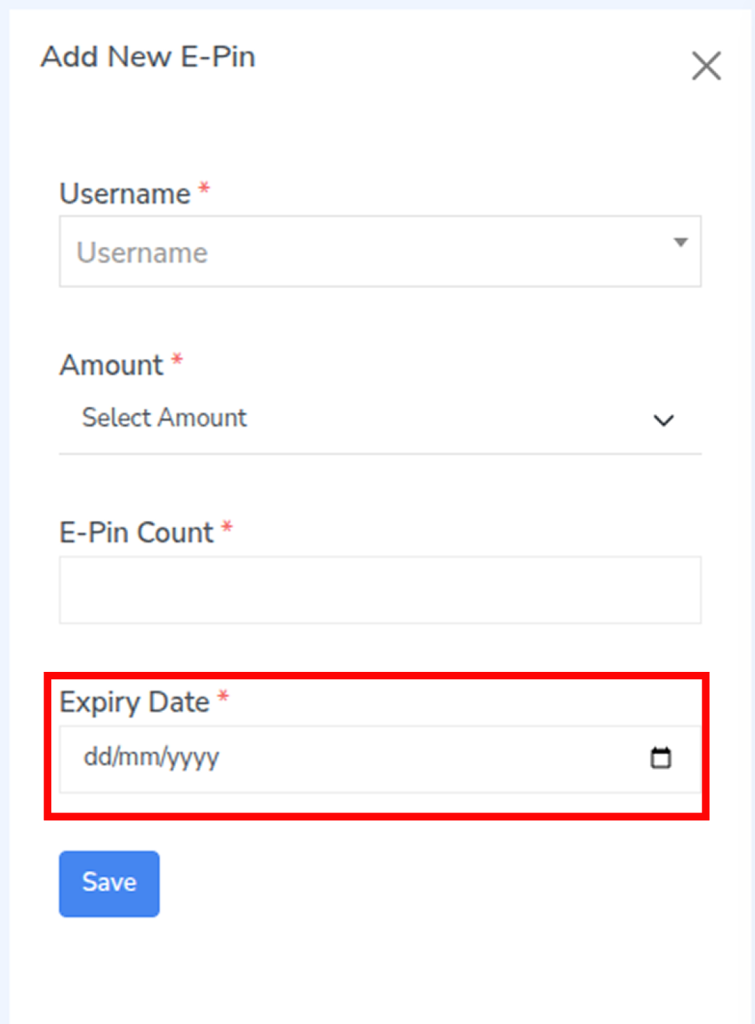
Step 7: Click Save to generate the E-Pins.
Important
- All fields marked (*) are mandatory.
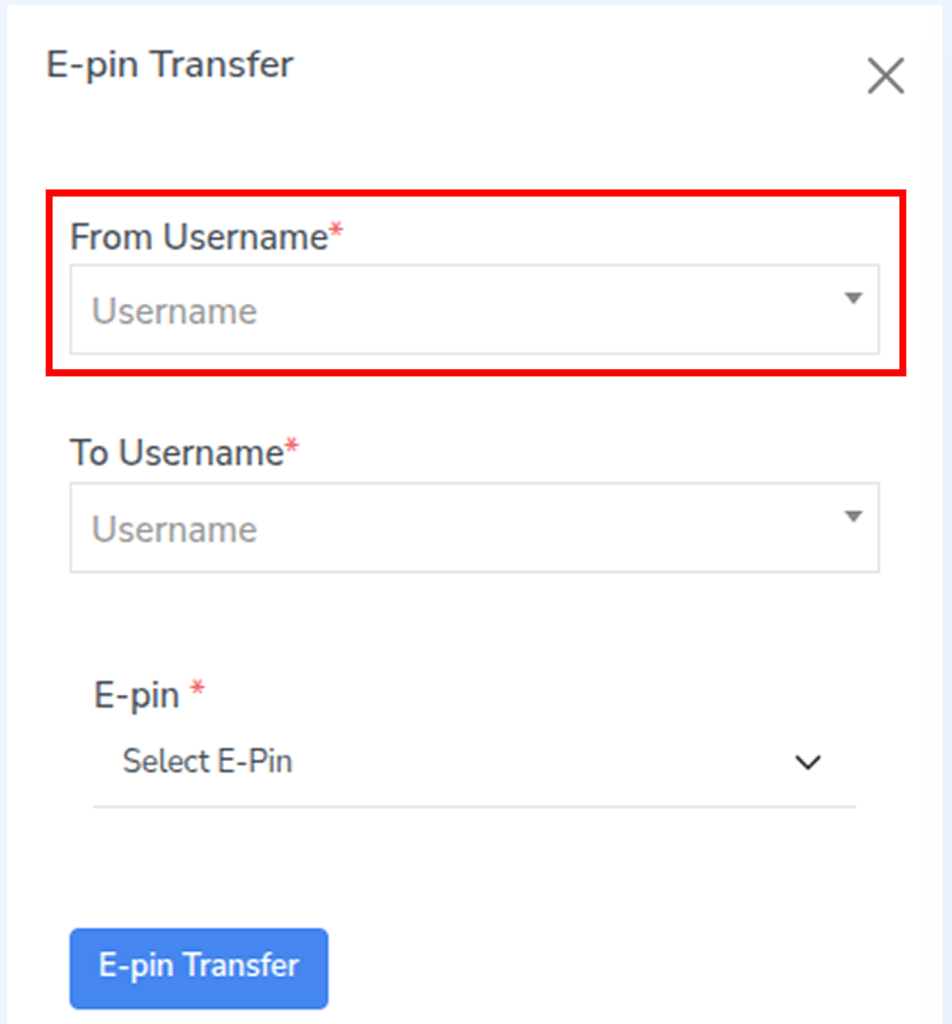
4. How to do E-pin Transfer?
Step 1: Navigate to the top-left of the screen and click the dropdown next to the Add E-Pin button.
Step 2: Select E-Pin Transfer. The transfer window will open.
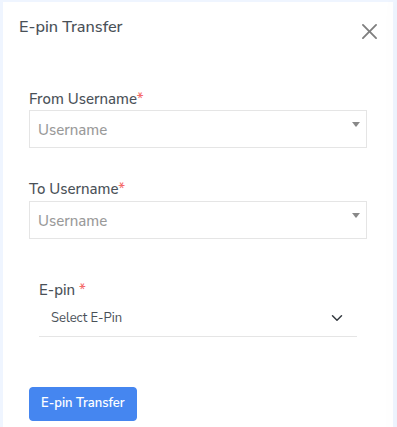
Step 3: In From Username, select the user who currently owns the E-Pin.
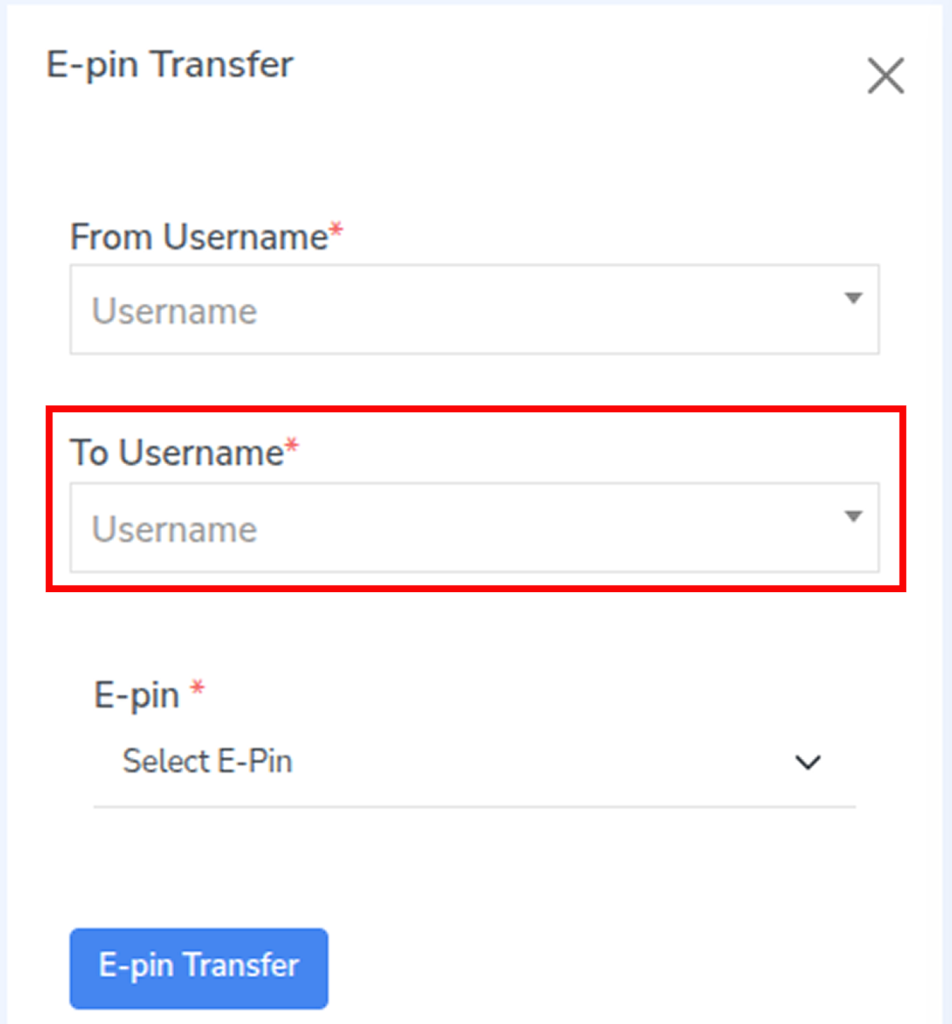
Step 4: In To Username, select the user to whom the E-Pin should be transferred.
Step 5: In the E-Pin field, choose the E-Pin you want to transfer.
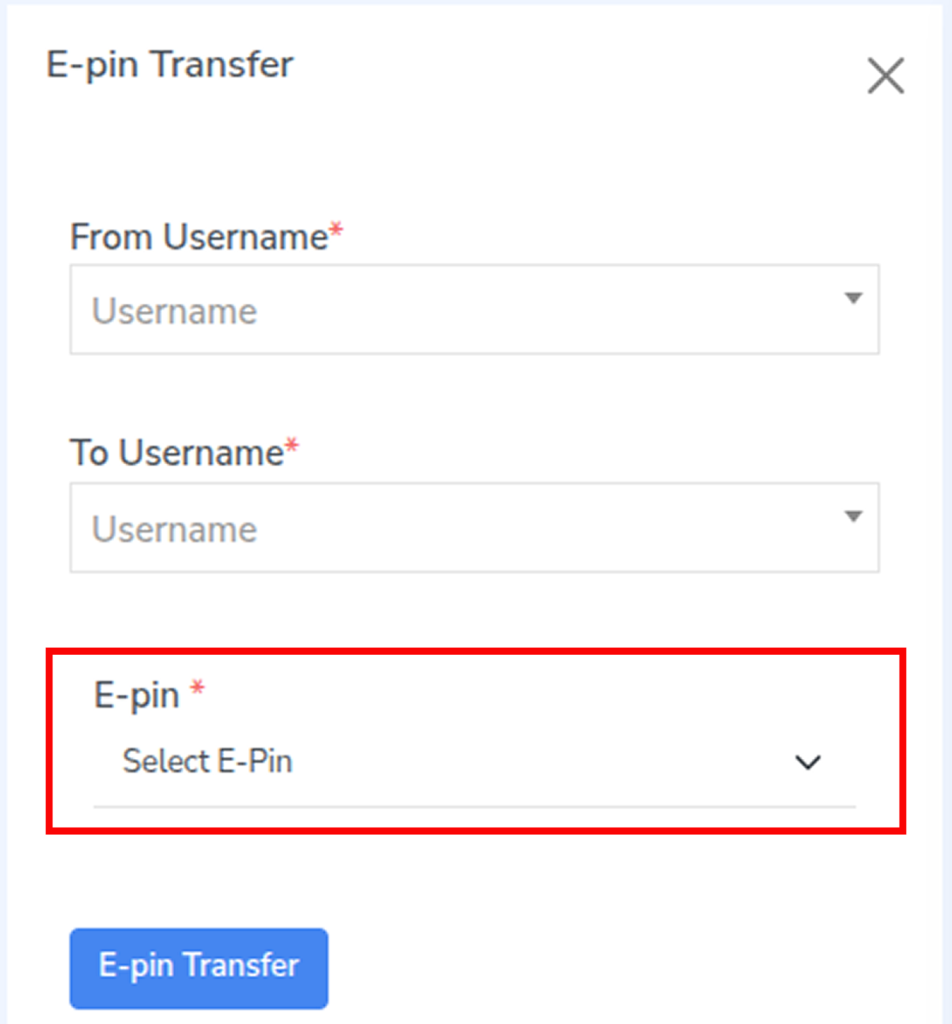
Step 6: Click E-Pin Transfer to complete the transfer.
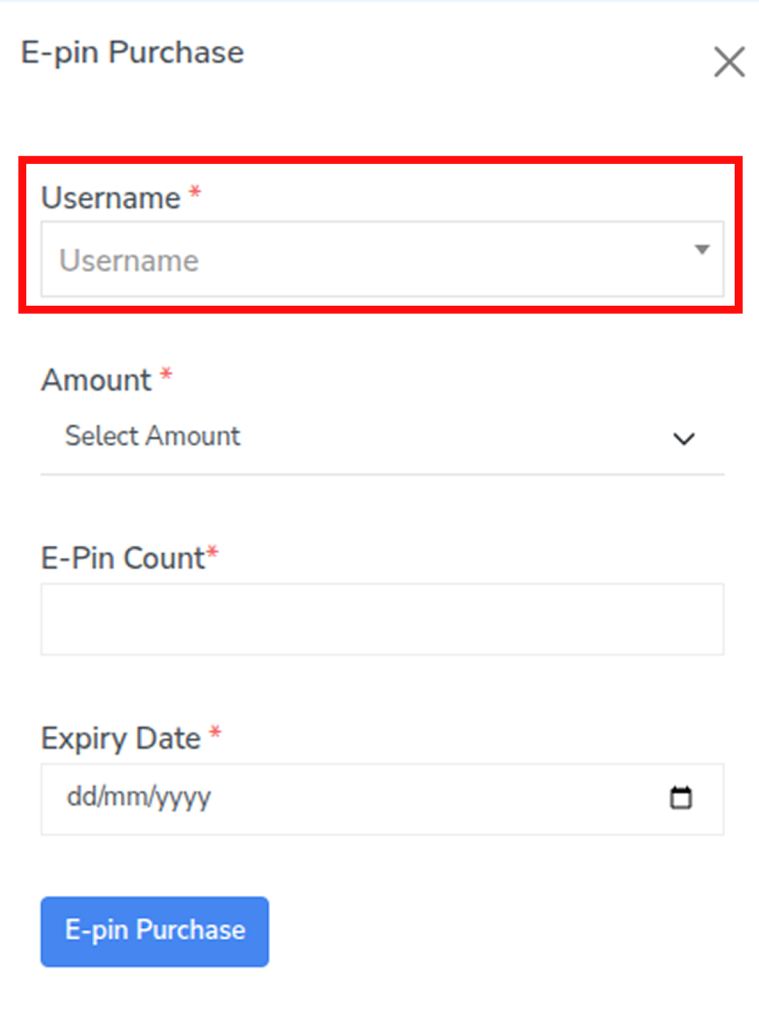
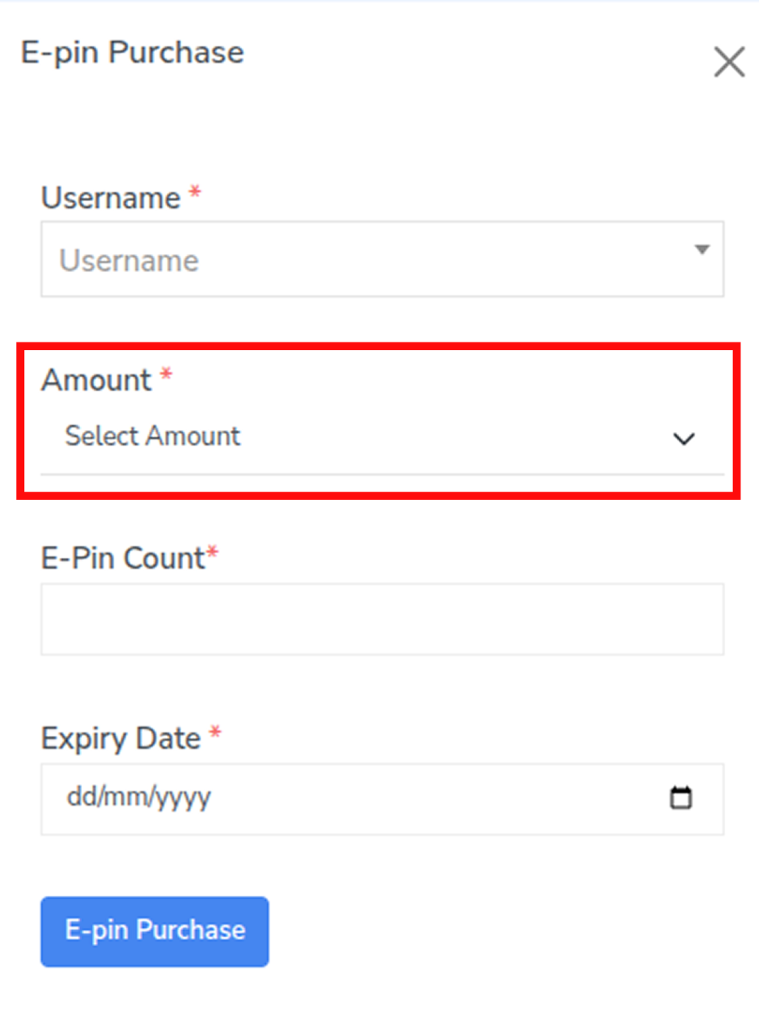
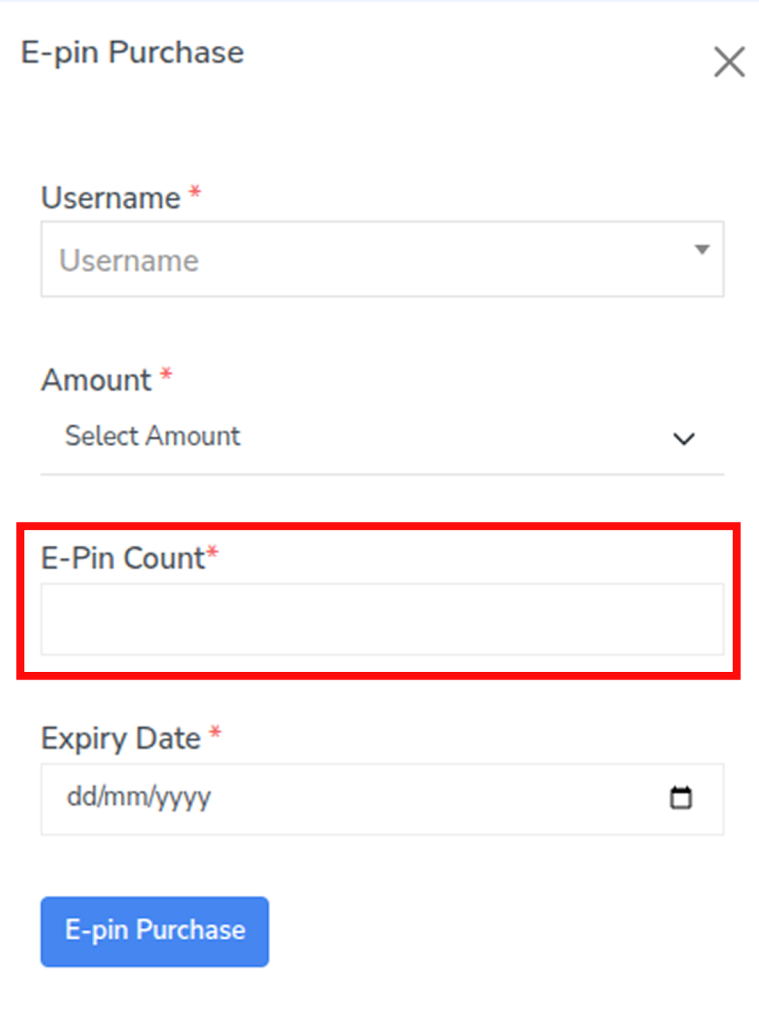
5. How to do E-pin Purchase?
Step 1: Navigate to the top-left of the screen and click the dropdown next to the Add E-Pin button.

Step 2: Select E-Pin Purchase. The purchase window will open.
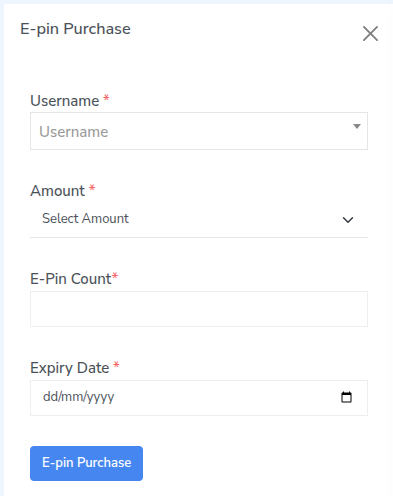
Step 3: In the Username field, select the user who is purchasing the E-Pins.
Step 4: In the Amount field, select the E-Pin value.
Step 5: Enter the required number in E-Pin Count.
Step 6: Select the Expiry Date for the E-Pins.
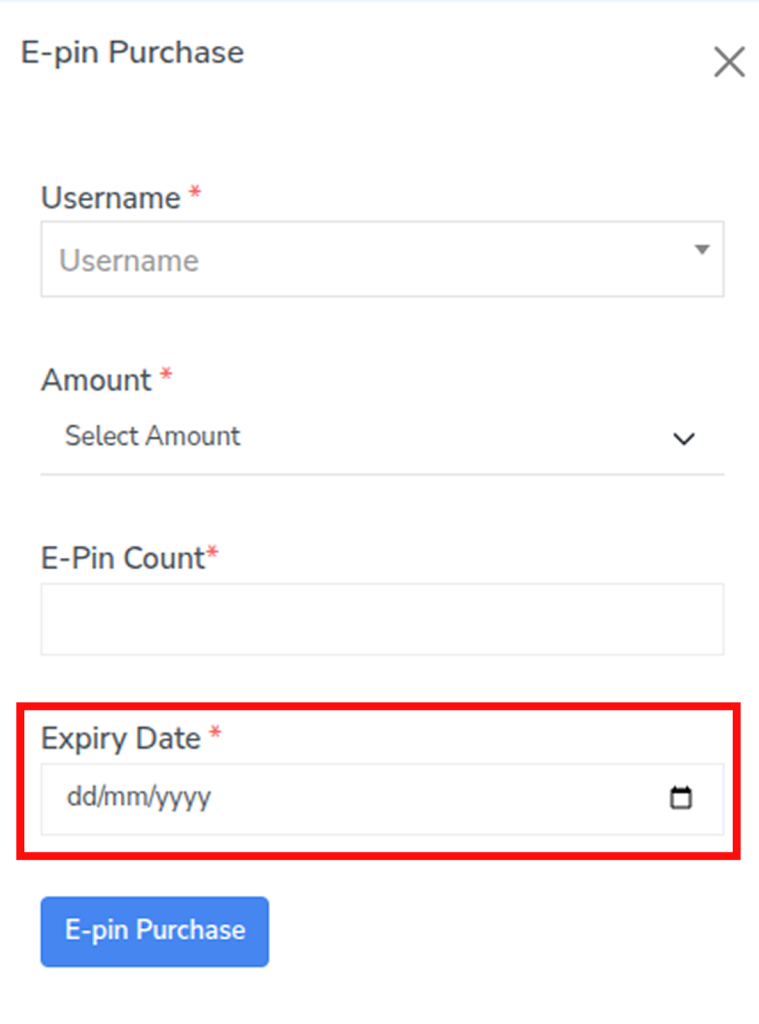
Step 7: Click E-Pin Purchase to complete the purchase.