An E-Pin generator can generate E-Pins that help to process user registration using produced E-pin.
An E-pin can be produced instantly by the website admin.
Later, the admin will deliver this E-pin to the new or current members via E-mail or by incorporating SMS Gateways.
For a user, E-pin provides the key to create new access.
How to view E-Pin status ?
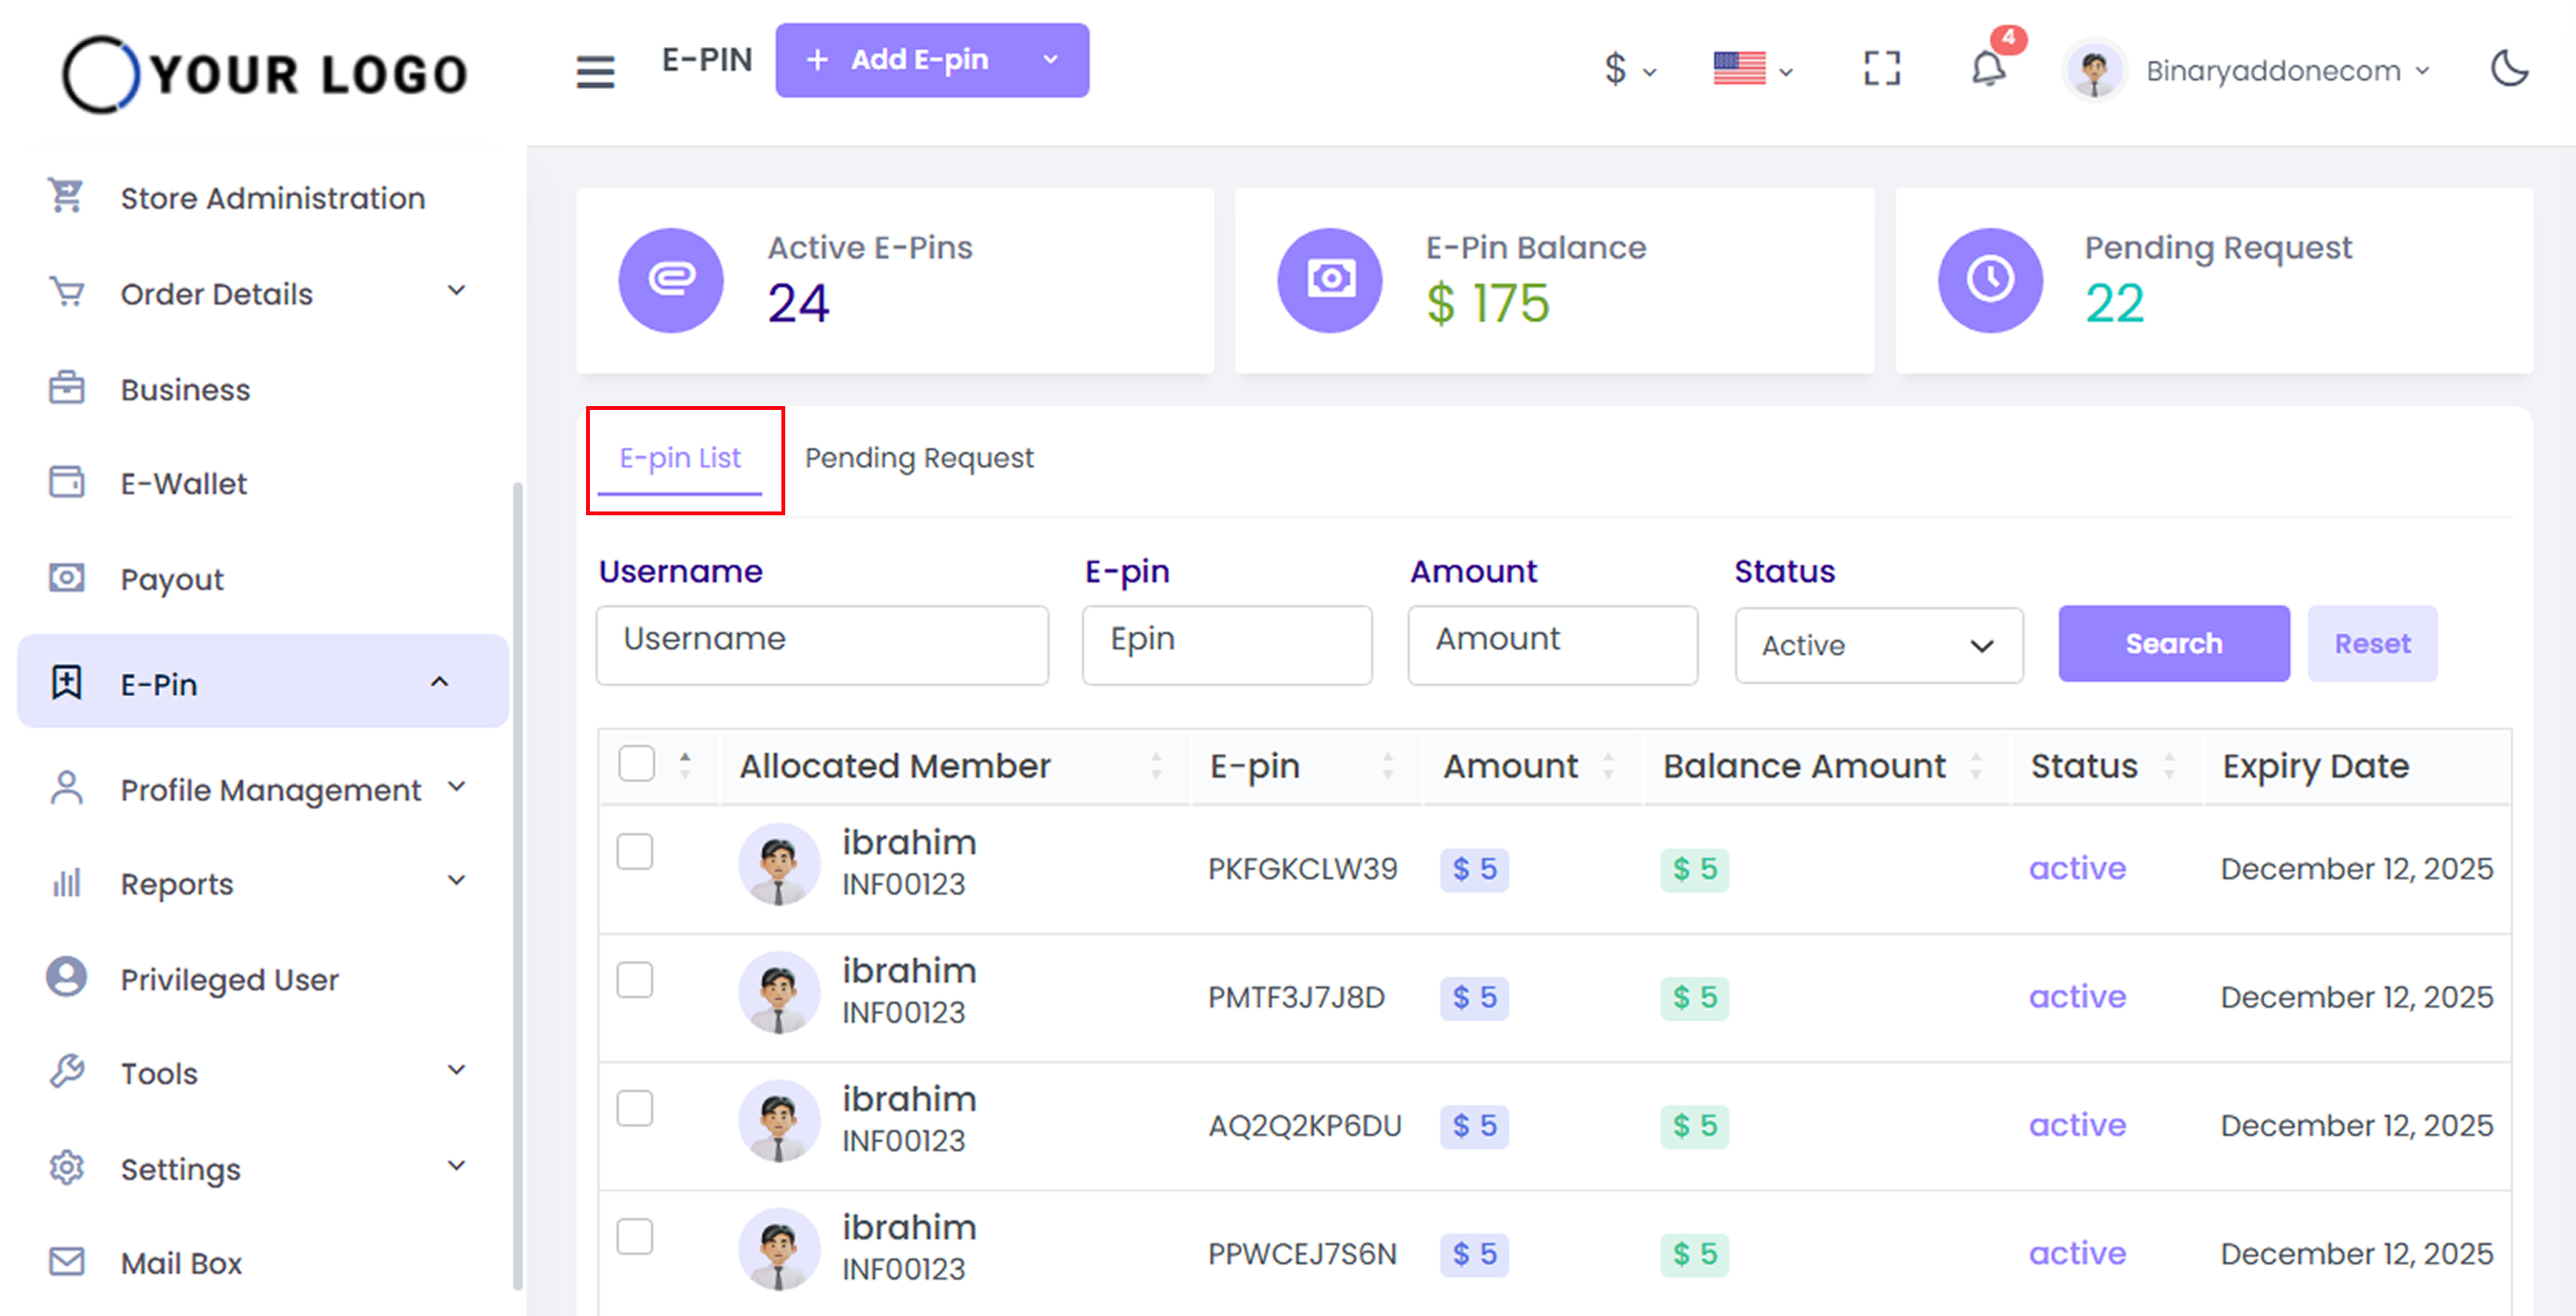
When you navigate to ‘E pin’ from the side panel of the dashboard, you can see details like Active E-Pins, E-Pin Balance, and Pending Request.
Also there are another tabs:
- E-Pin List
- Pending E-Pin Request
- Add E-Pin
How to view an E-Pin List?
Click on the E-Pin List tab to view all E-Pins available in the system for any specific user.
Enter the following details:
- Username: Enter the username
- Amount: Enter the E-Pin amount
- Select the E-Pin Status( Active/ Blocked/Used/Expired/Deleted)
Click on the search button to list the E-Pin as shown in the below screenshot.
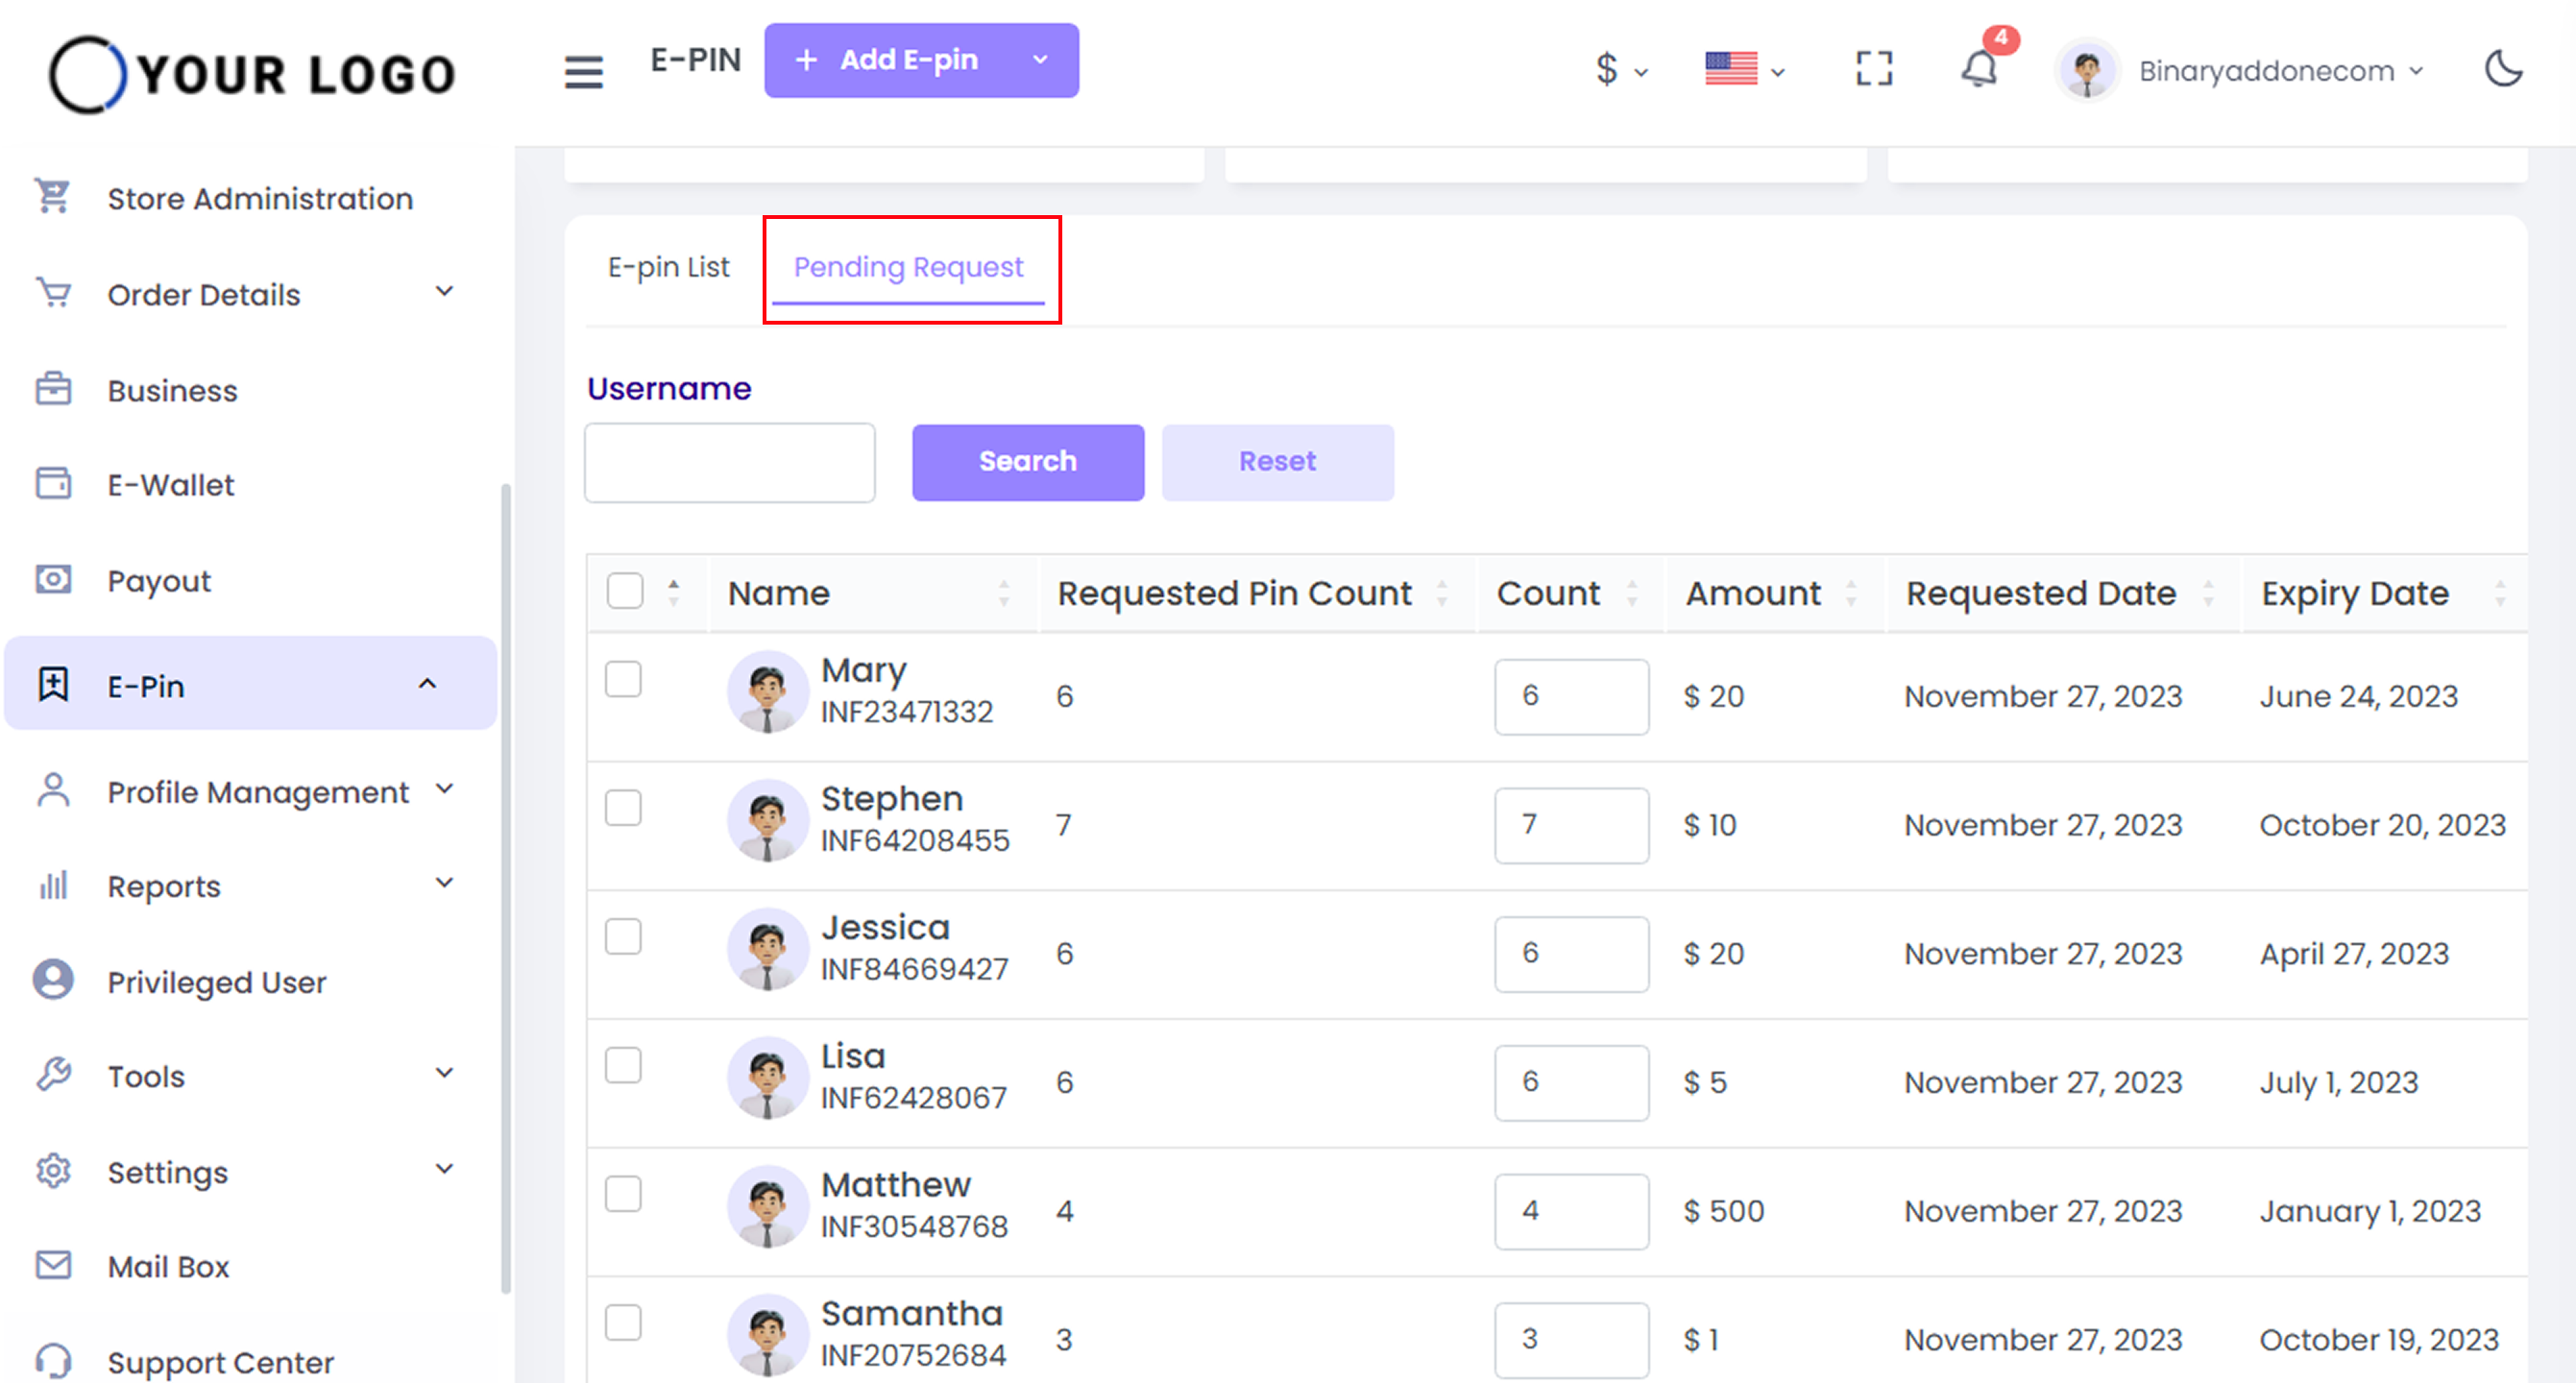
Pending Request
Name, requested pin count, count amount, requested date, and expiry date.
Search by entering the username to see the pending requests of each user.
How to add an E pin?
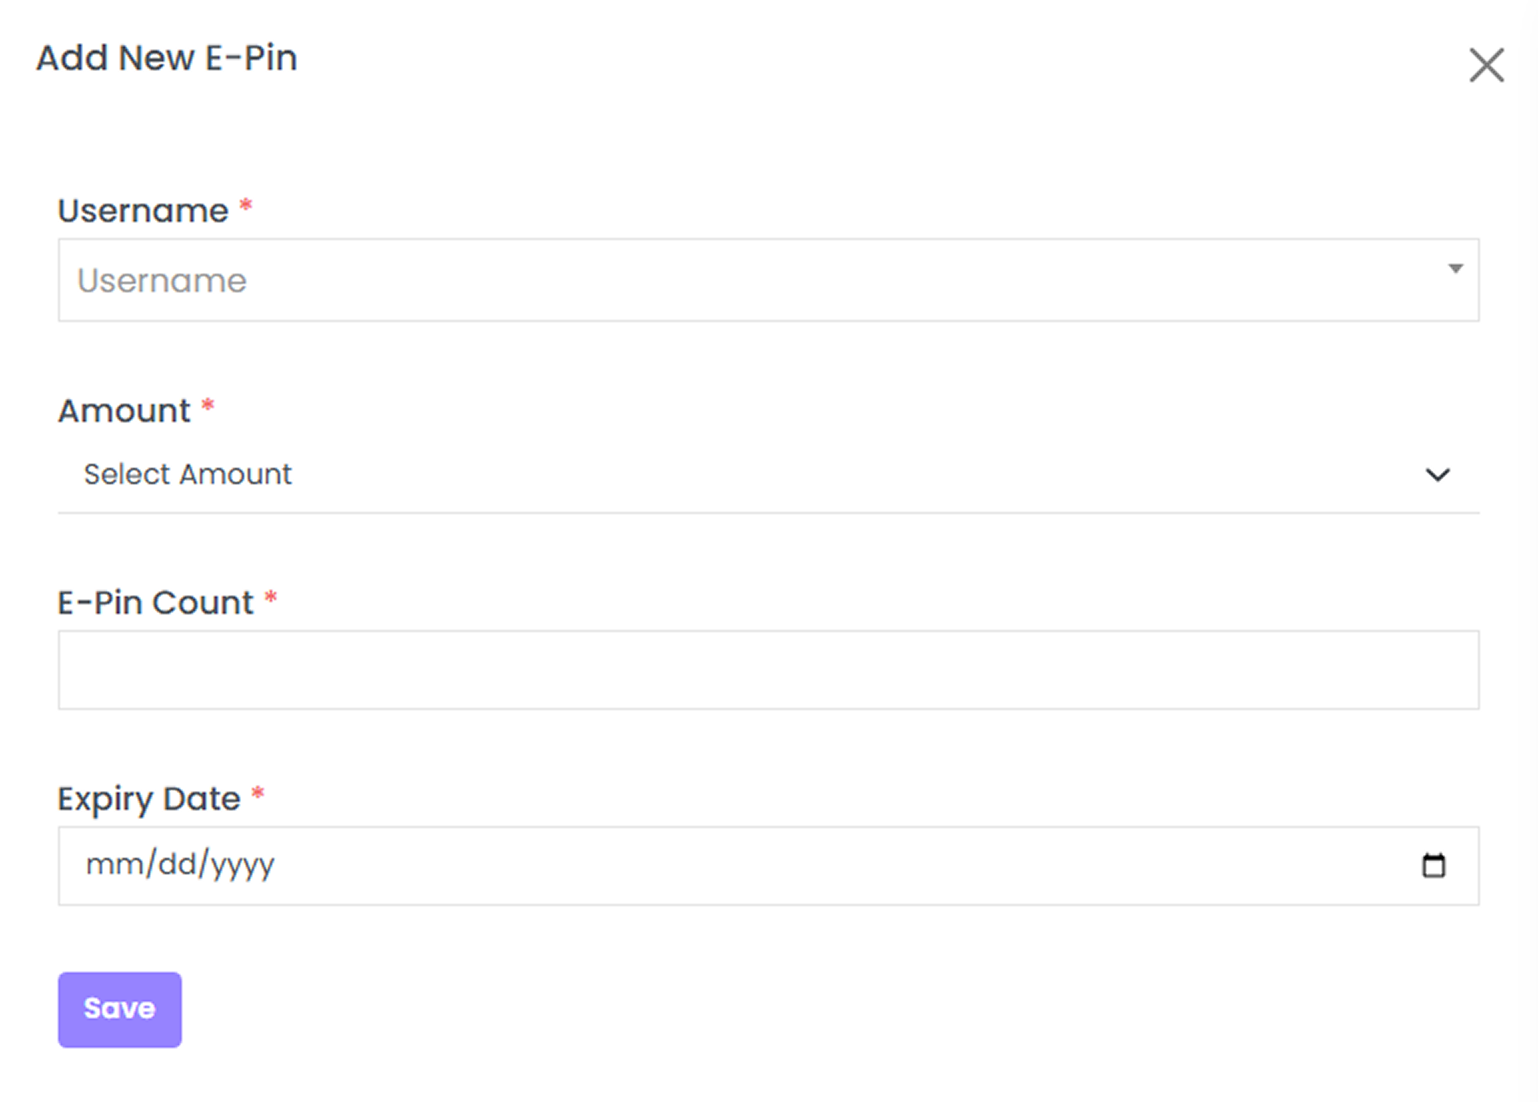
To add an E pin, click on the ‘Add E pin’ button from the top right corner. Enter the required details, and click on save.
How to Transfer an E-Pin?
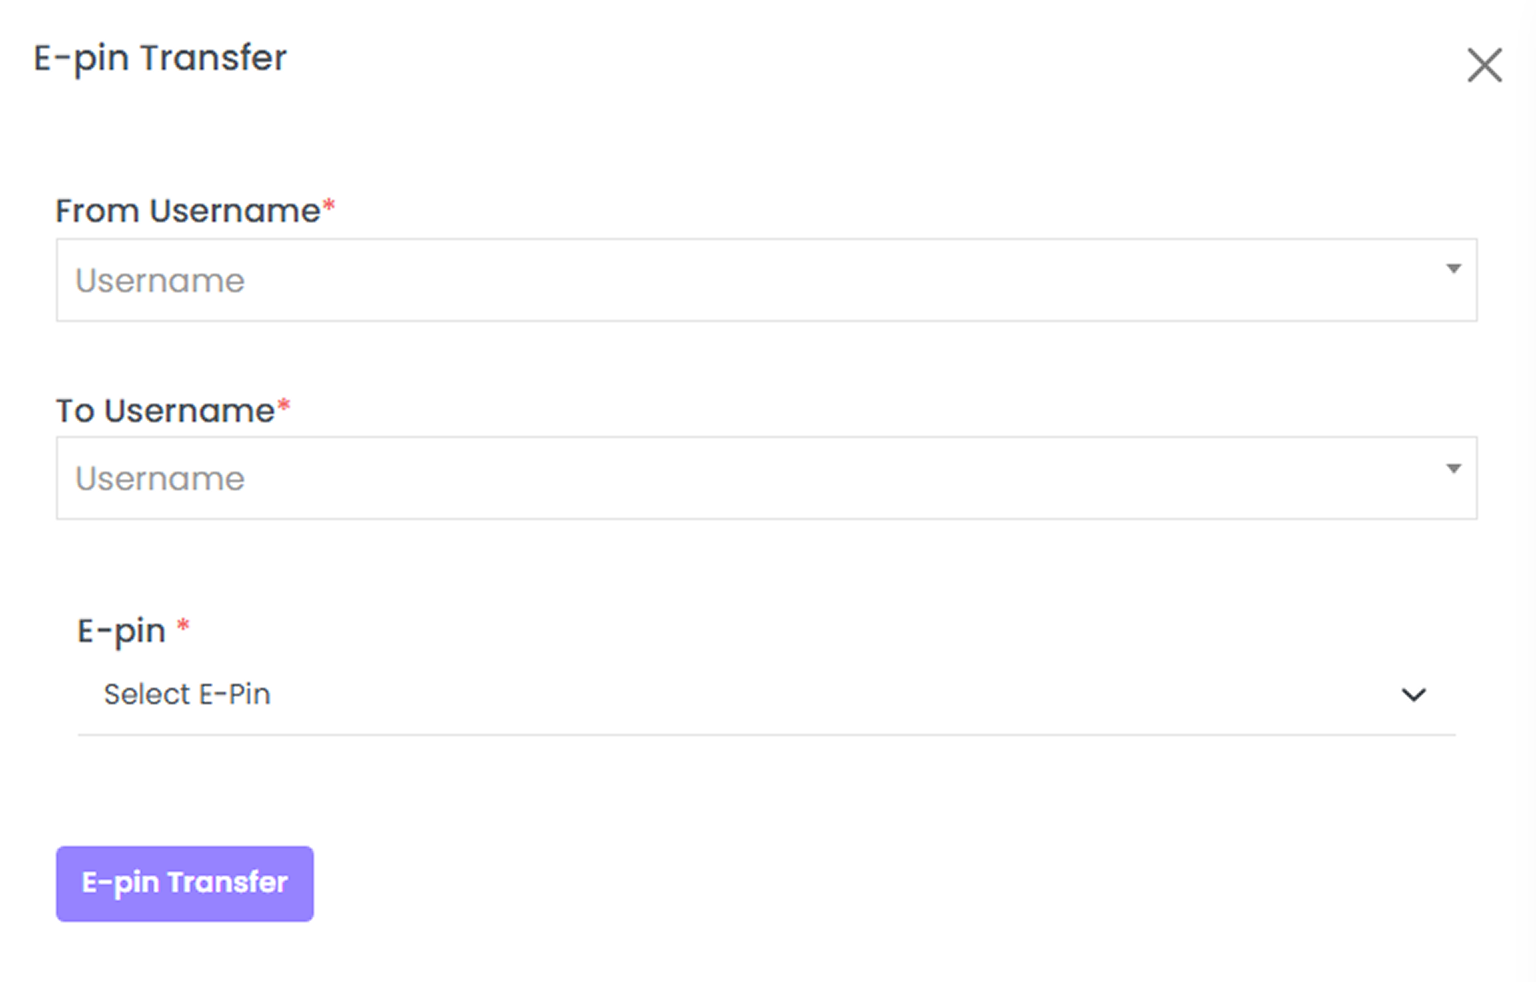
To transfer e pin, click on ‘E Pin Transfer’ from the drop down of ‘Add E-pin’. Input the from and to usernames, select the E pin, and then click on the button ‘E Pin Transfer’. The message ‘e pin transferred successfully’ appears.
How To Purchase E Pin?
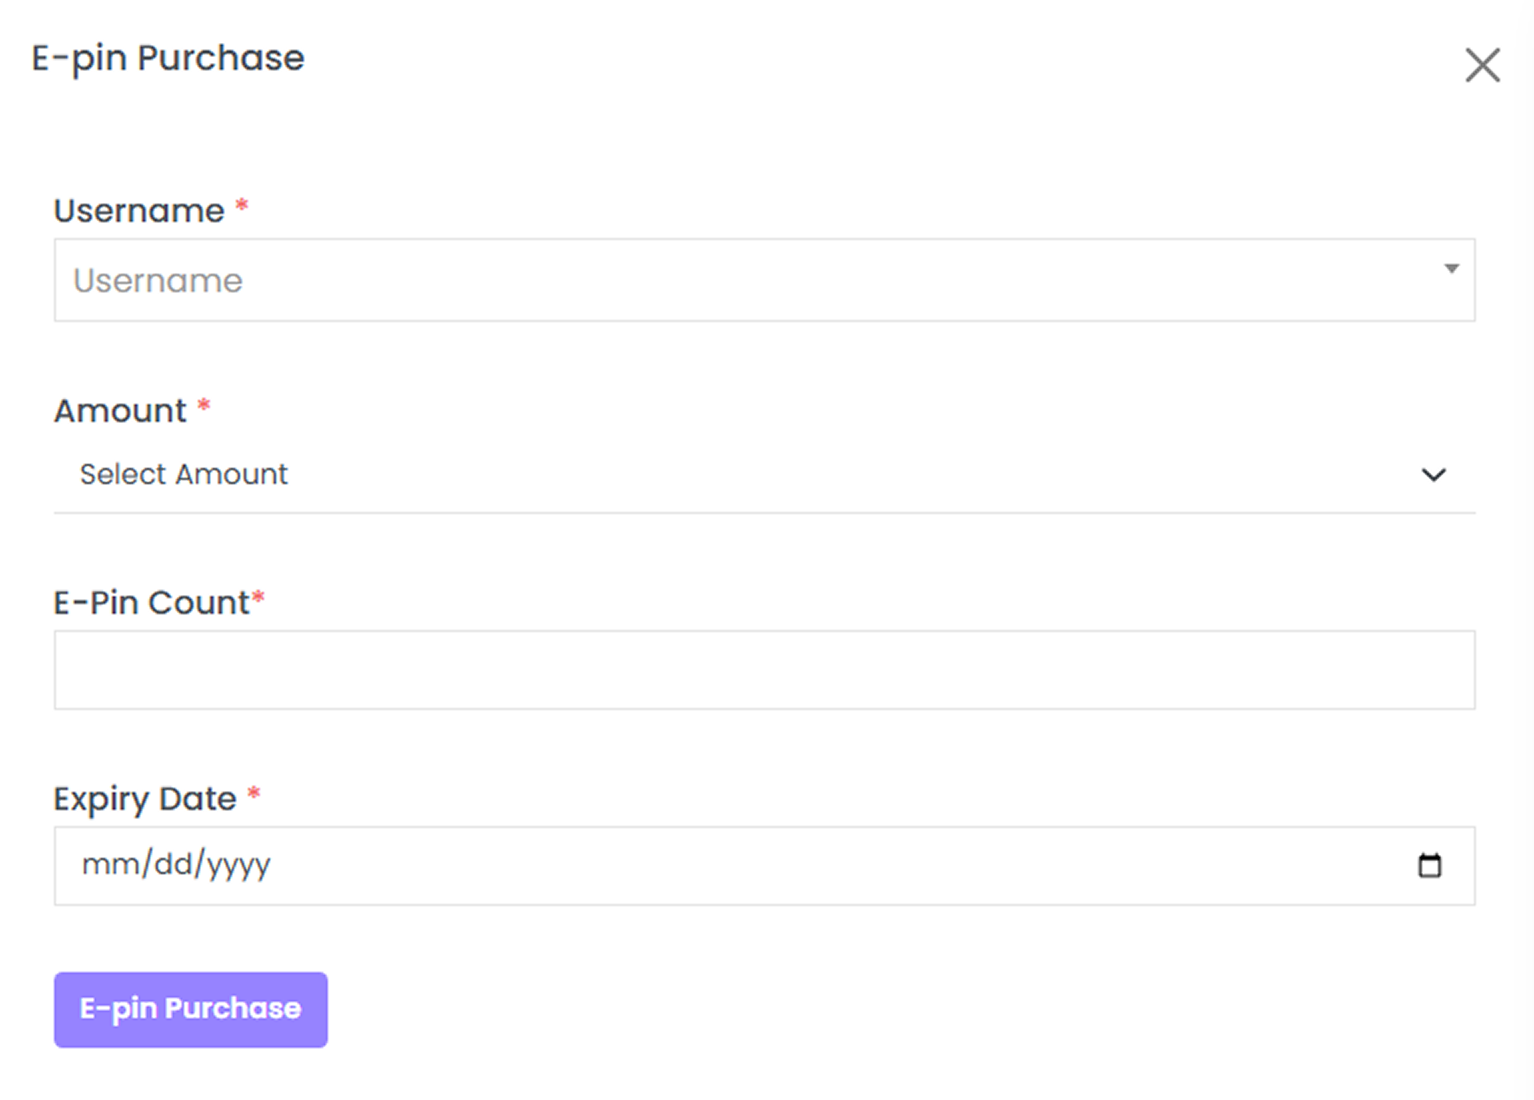
To Purchase e pin, click on the ‘E Pin Purchase’ from the drop down of ‘add pin’ in the top right corner. Enter the username, amount, e-pin count, and expiry date. Then, click on ‘E Pin Purchase’ button. The message of ‘E-Pin purchased successfully’ appears.
